Using the Campaigns Module
The Campaigns module gives users the ability to observe and manage the ad spends for Google Ads, Microsoft Ads, and/or Meta Ads. The dollar amounts are preset in the Budgets module. For details on how to set that up, refer to this article.
There are 2 tabs in the Campaigns module; Campaigns Overview and Campaign Insights.
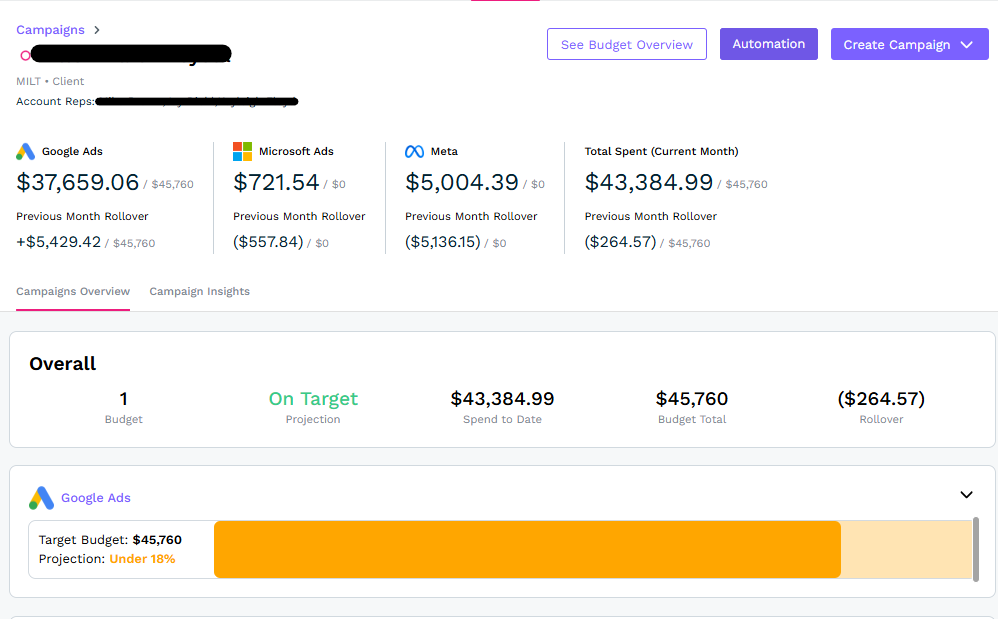
The Campaigns Overview tab displays the different ad groups (Google, Microsoft, and Meta), in a bar graph view with their respective budgets and projected ad spend %. Above the bar graph, you’ll see the 3 different ad groups, the amount spent so far for the month, and any previous month’s rollovers for the 3 different ad groups. To the right of those ad spends is the total amount spent so far across all of the ad groups.
Below that section and just above the bar graphs is a summary section showing if the projection is on target or is running behind, the ad spend so far for the month, the budget, and the rollover from the previous month. Both sections are static and cannot be interacted with.
Below those sections is the bar graph that shows the individual ad groups for Google, Microsoft, and Meta and how they are performing for the month. For each of these ad groups, if there is a budget for them, you will be able to see the target budget and projected spend on the left hand side. If the projection is behind where it should be, it will display as yellow or red, depending on how far behind it is. If the projection is close to being on par, it will display as green. You can also hover over the bar graph and a pop-up will appear displaying the actual spend and approved budget. If one of the ad groups doesn’t have a budget, the bar graph will show up gray.
Each bar graph can be clicked on to expand the details and show the performance of each individual ad campaign. Once expanded, you’ll be able to see the approved budget, targeted spend, and actual spend. The table can also be grabbed and dragged to the right to uncover columns such as clicks, impressions, conversions, and more. Each ad campaign also shows a correlating projection so if an ad spend is ahead or behind, it can be determined exactly which campaign the problem is coming from.
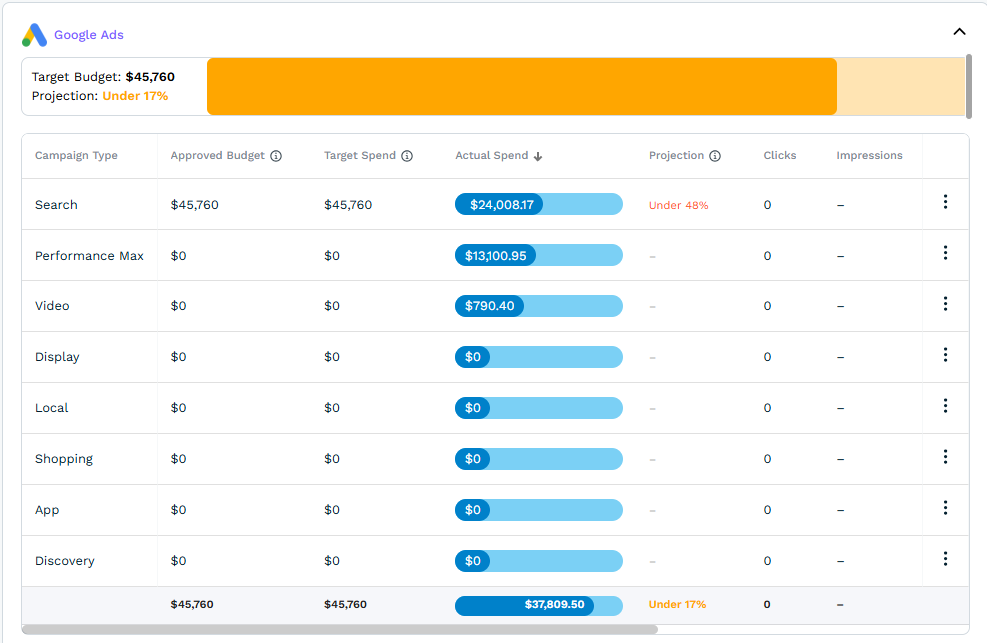
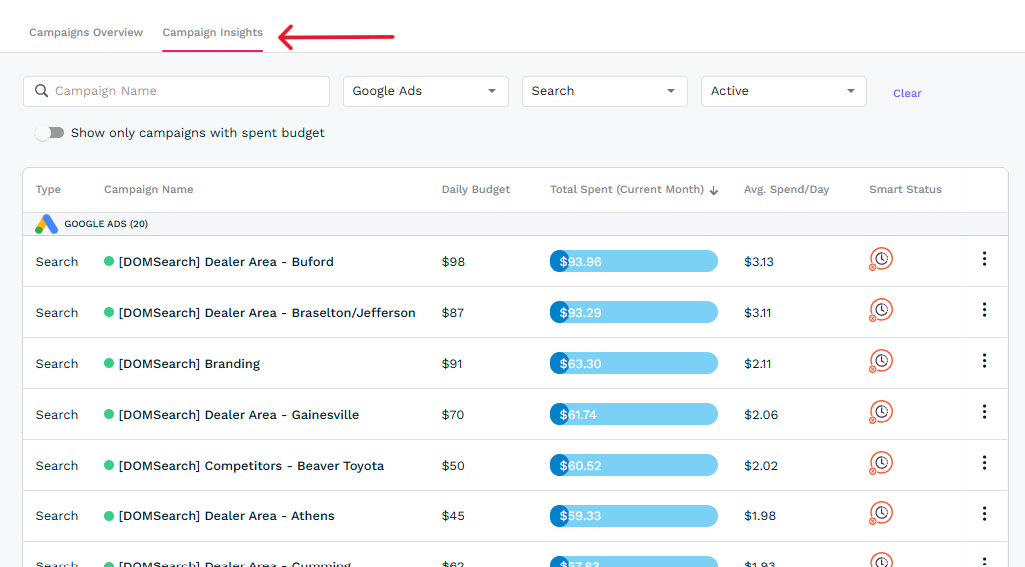
You will also have the ability to drill down into these ad campaigns even further by clicking on the 3 dots on the right hand side. A pop-up will appear with the label “View Campaigns”. Once clicked, the screen will refresh and all of the Search campaigns (for example) will display showing the daily budget and average daily spend.

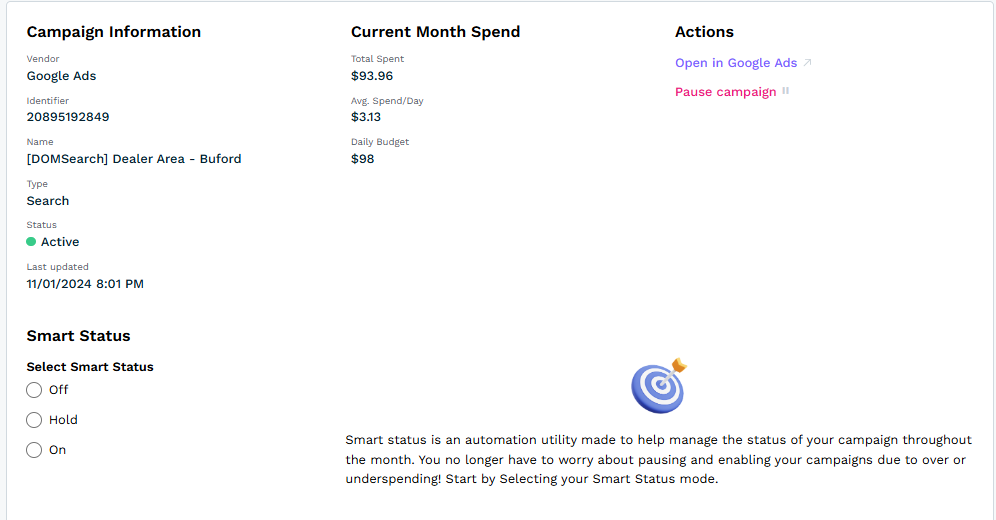
Once again, you’ll be met with 3 dots on the right side that will provide 3 different options; Pause Campaign, View Campaign, and View Change History. An admin will have the ability to control campaigns directly from DealerVerse without having to log into Google Ads. The campaign details page will allow you to see details about the individual campaign, to pause it, to open it in your Google Ads account, or to select to utilize Smart Status. Smart Status self-regulates your campaigns, auto pausing and unpausing them so you don’t have to worry about it.
The Campaign Insights tab at the top is the shortcut to the view when you clicked on “View Campaigns” from the Campaigns Overview tab. It’s just a quicker way to navigate to your campaign details.
The three buttons at the top of the page are See Budget Overview, Automation, and Create Campaign.
See Budget Overview will take you back to the Budgets module.
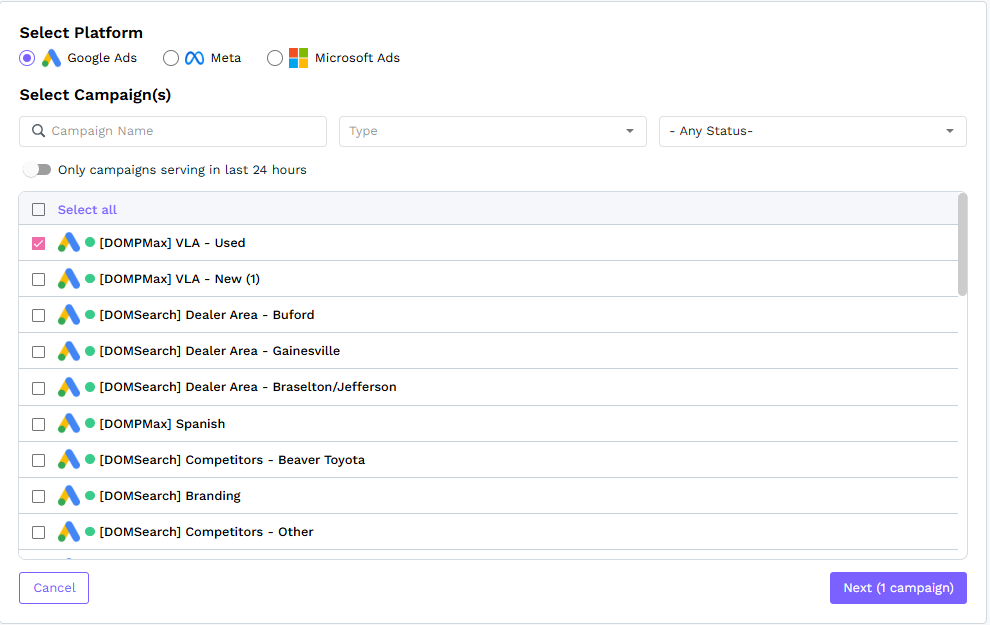
The Automation button will take you through a brief wizard to set up your campaign automation. You will first need to select the platform and then it will load all the campaigns associated with that platform. If the integration hasn’t been set up yet, it will gray that option out for you. Once you’ve selected all the campaigns you’d like to automate, you can click the Next button.
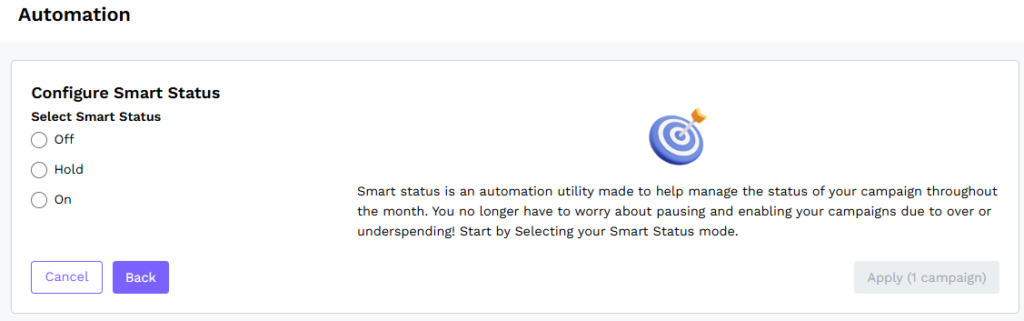
The next screen will allow you to configure the Smart Status, which will automatically pause and start the campaign(s) as needed to avoid underspending or overspending. Once you select On, you can just click the Apply button and you’re done!
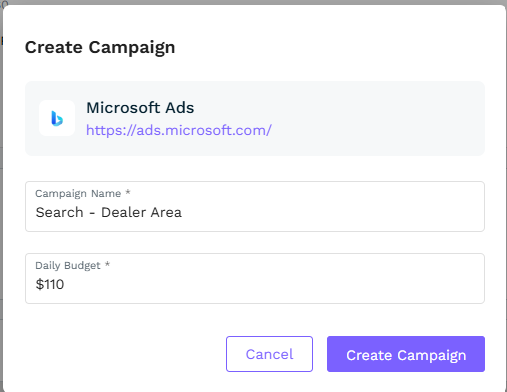
The Create Campaign button provides a shortcut where you can add additional campaigns via a drop-down. Only the platforms that have been integrated will display in the drop-down menu. Simply add the campaign name and a daily spend amount and click the Create button.