
Adding and managing users
Introduction
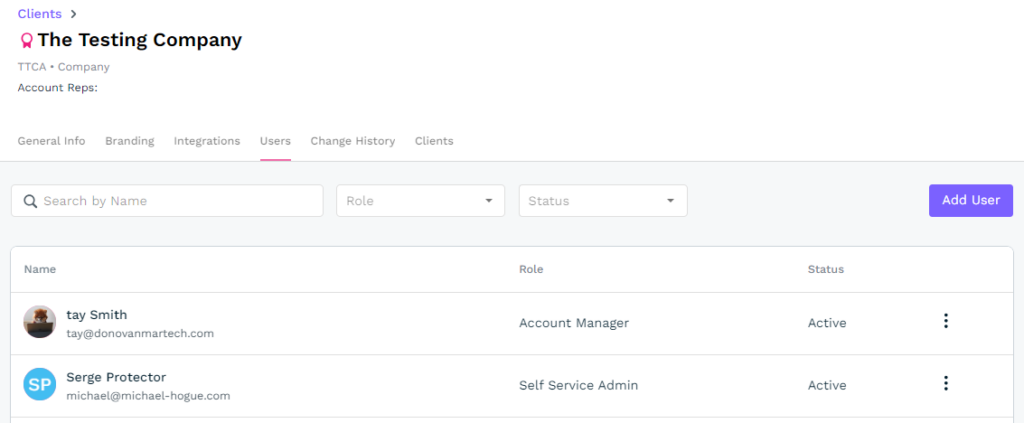
Users can be found at the Company level and the Client level. To review the relationship between companies and clients, refer to this article. If a user is added to the Company level, they will automatically be added to every Client under that Company entity. So, if you only want the user to be added to a single client, only add them to that client.
Adding a new user
As an example for adding users, we will look at the client level only. To start, a client must be selected first, which will redirect you to the client’s General Info tab. Just click on the Users tab and then click the Add User button. A pop-up will appear asking you to search for the username.
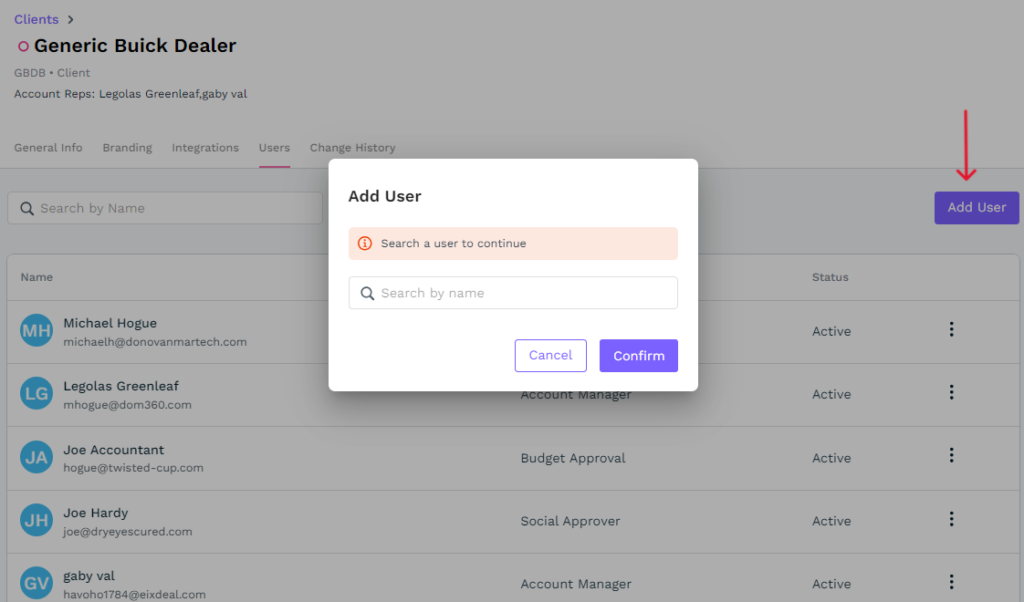
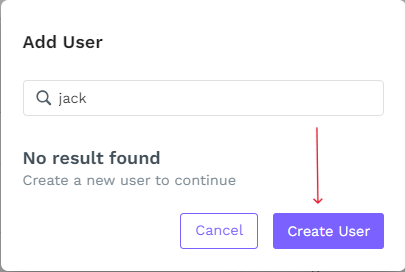
Type the name of the new user in and it will search to see if the user already exists. If there is a match, it will pull the user up. If there isn’t a match, it will tell you that there are no results found, at which point, you will need to click Create User.
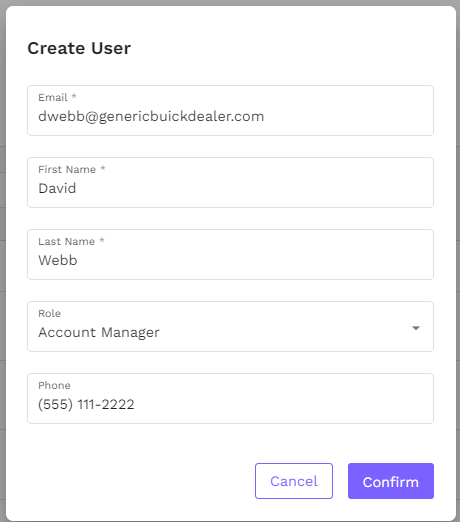
You will be prompted to enter an email address, first and last name, phone number, and to select a user role. Once all of these fields have been filled out, click Confirm to save. You can always go back and edit the user later, if necessary. Once the user has been saved, a pop-up will appear and tell you that the user was added successfully. It will also give you the option to close the pop-up or to add another new user.
The user roles include the following options:
- Account Manager
- Account Coordinator
- Analyst
- Budget Approver
- Client Admin
- Company Admin
- Creative User
- Digital Marketing Specialist
- Self-Service Account Rep
- Social Approver
- View Only
Managing Users
To manage a user, click the 3 vertical dots associated with the user. A drop down will appear with 4 options: Edit, Remove, Deactivate, and Resend Email Confirmation.
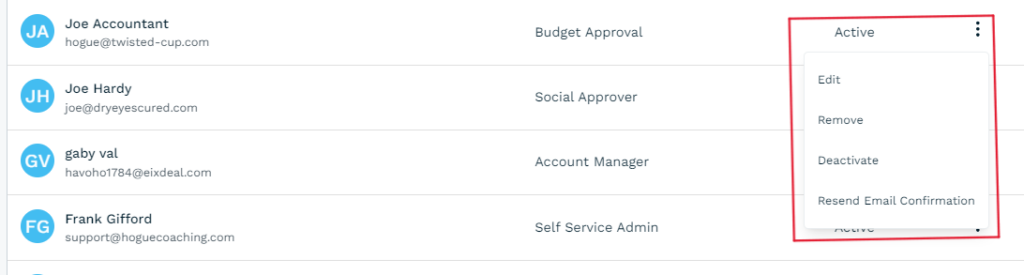
When you click the Edit option, the same pop-up that appeared when the user was initially created. You will have the ability to edit all of the fields mentioned above, except the email. Once the user has been created, the email can’t be changed.
Clicking Remove will delete the user from DealerVerse while clicking Deactivate will make them inactive, but leave them in DealerVerse should they be needed later. Resend Email Confirmation will send another email invitation to the new user so they can join DealerVerse.