How can we help?
Creating a Social Post
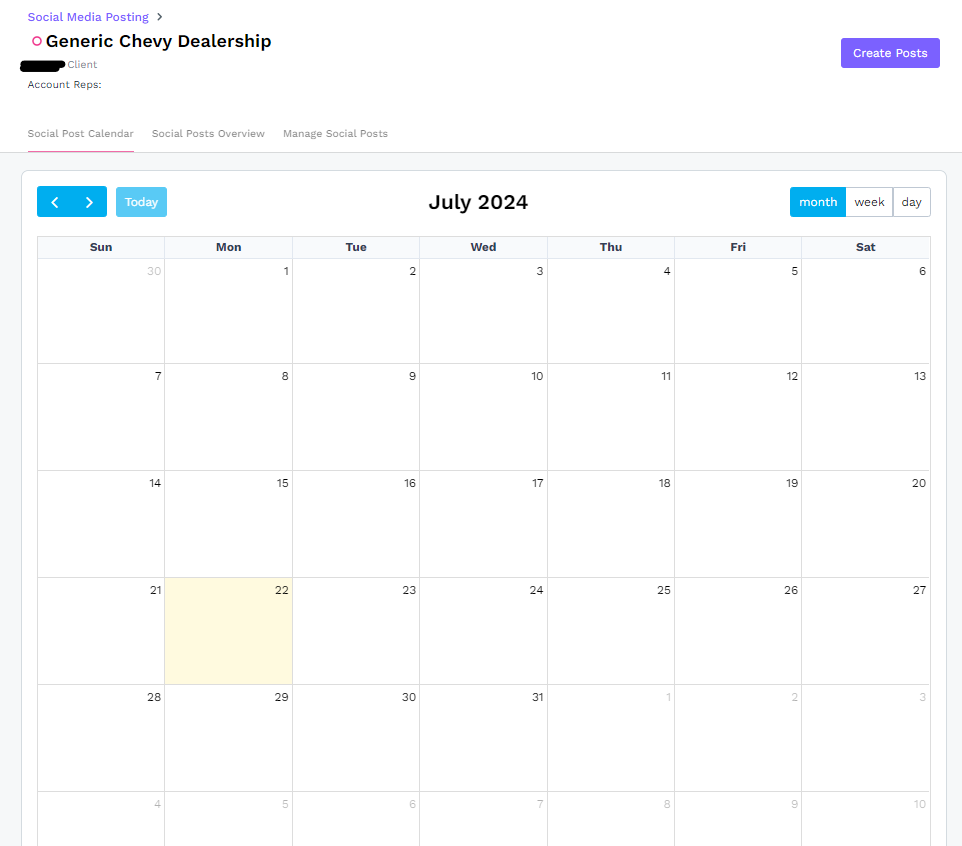
- To create a social post, you must navigate to the Social tab in the top navigation. You will then be directed to the Social Post Calendar tab where you can click the Create Posts button.
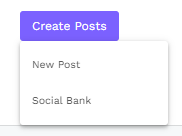
- When the Create Posts button is clicked, a small drop down menu will appear with the options New Post and Social Bank.
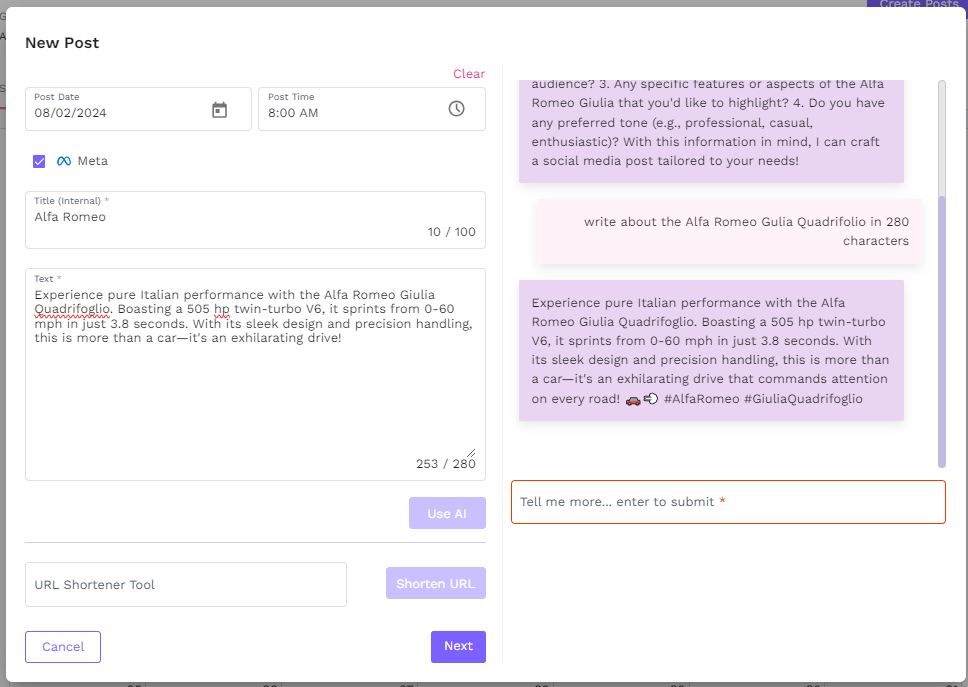
- A New Post will allow you to add any text, link, and image that you would like to. At the top, you will see the ability to select a post date and time for scheduling. If you prefer to post it now, leave these fields blank.
- Secondly, you will be able to select which social media platform(s) you’d like to post to with a checkbox.
- The Title field allows you to enter an internal name for the post so you can easily see what the post is about on the calendar.
- You will have a 280 character limit in the Text field to accommodate for X, but this would be what you would enter for the body of the post.
- As part of the text field, you will be able to make use of the AI functionality. To use it, enter a few words into the text field and then click on the Use AI button to engage. The AI will then ask you for further details, which you can provide in the space below. Instruct it on what to write about it as well as the style it should be written in. You can even specify for it to keep it to 280 characters or fewer to fit within X’s character limit.
- The last field allows you to add a link to your post, and also provides you with a built in link shortener to make it easier to fit within X’s 280 character limit. Once the link has been shortened, just copy and paste it into the text field.
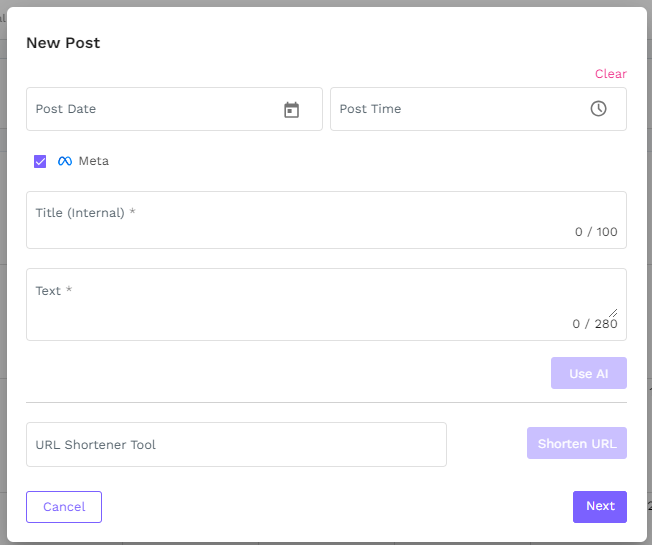
- Once all of the required fields have been filled in, click Next to go to the next step.
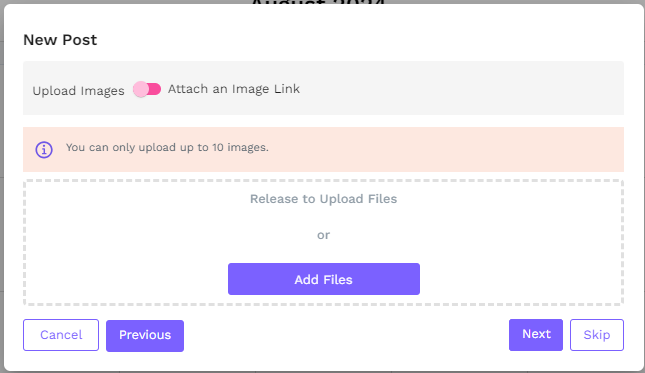
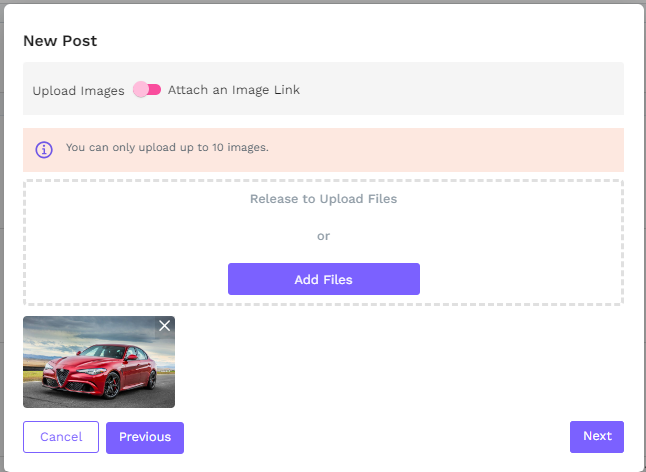
- On this page, you will have the option to upload an image from your hard drive or to link an image from the internet. At the top, you’ll see a toggle to go back and forth between using an upload or using a link to add your image. You can also navigate between previous, next, and skip. Once an image has been uploaded, it will display just above the navigational buttons.
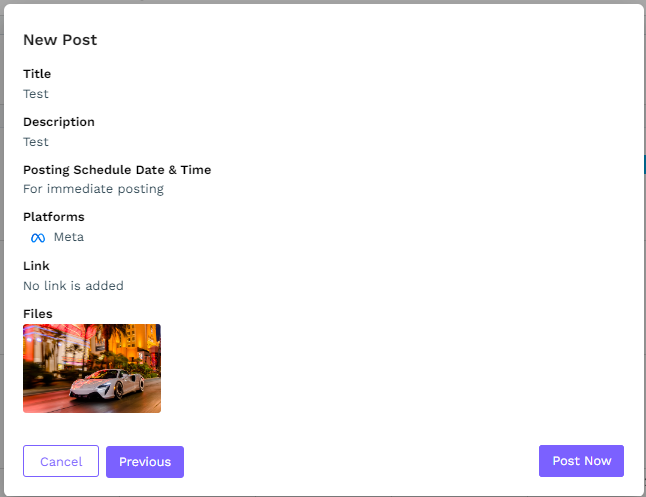
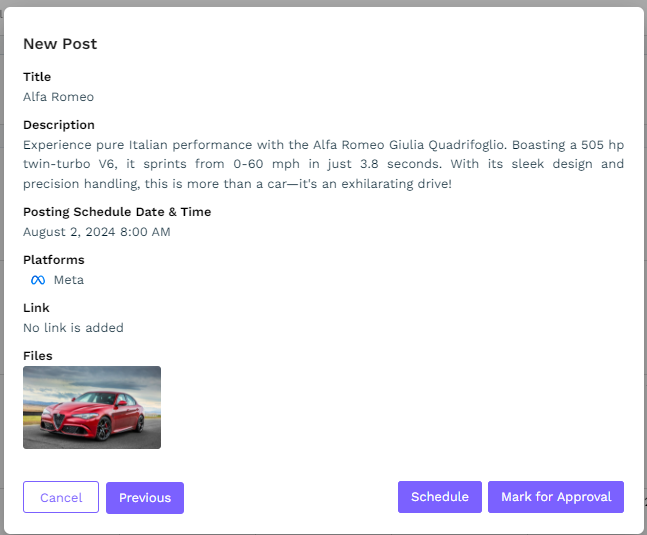
- When you click the Next button, you will be shown the details of your post where you can review everything at once and decide how to proceed. From here, you have the option to go back to the previous screens to make edits, you can go ahead and schedule the post for the date and time previously entered, or you can mark the post for approval from a social media approver. For details on the approval process, please refer to this knowledge base article.
- If the post has been scheduled, it will show in the calendar as a blue color. Once it has posted, it will display as green in the calendar. If the post fails, it will display as red.
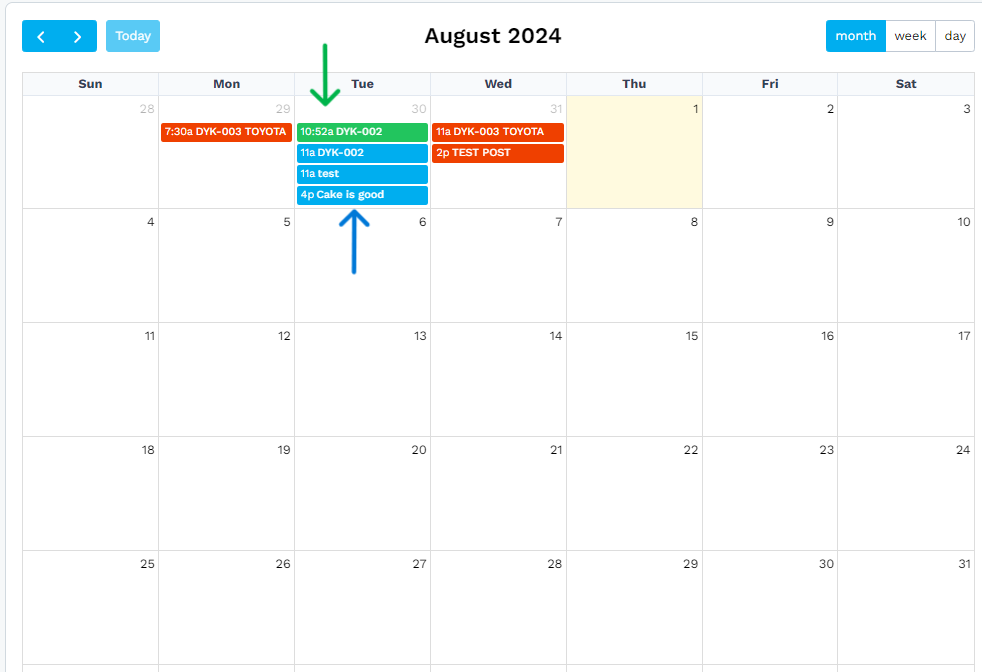
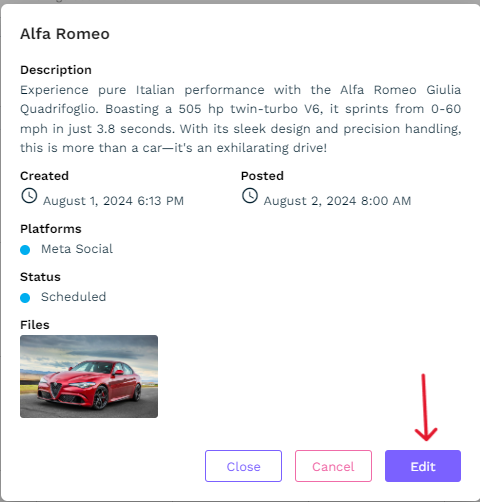
- A post can be reviewed by clicking on it to see the details. If the post is still scheduled, it can still be edited or cancelled.
- In order to post a new social post immediately, click the Create Posts button, and do not enter a schedule date or time. All other fields can be filled out as normal. When you click Next, add your image, and then click Next again, you’ll see that the only option is to Post Now.